
Feb 27, 2026
NOTE: This article is a more detailed version of a talk that I'm giving at the March meetup of Full Indie, titled "Congratulations, you are a Graphics Programmer!".
Ever wanted to be a graphics programmer, but didn't know where to start? Maybe you got overwhelmed by the vast degree of knowledge that you think you may need to do something you want to do? Thought you needed a bunch of math, computer science, or spend massive amounts of time trying to figure out modern graphics APIs?
I don't really blame you. :) And what I want to show here is that it can be actually pretty easy to get started despite all of this complexity.
If modern graphics programming seems unapproachable for any reason, it's probably because we have iterated on over 50 years of research, innovation, and theory. Computer-generated imagery and video game graphics become more realistic by the year, to the point where tools like Unreal Engine have supplanted more specialized software suites in film-making, with hardware scaling to accommodate.
But at the core of all of this, the fundamentals are still there if you know where to look. Problem is, looking at the modern landscape, you might not know where to start!
Say you wanted to look outside an engine so that you could really start to understand theory. Do you start with one of the modern GPU libraries? Immediately you're faced with a bit of a conundrum, as there are 4 modern APIs across the 3 major computing platforms, with consoles possibly complicating matters depending on what you are targeting. "Hello triangle" examples - GPU API versions of the classic "hello world" programming language examples - can easily span thousands of lines of code. I also hope you like learning domain-specific languages, because GPUs have those too1, in the form or shader languages like Slang, GLSL, HLSL, etc.
Add on having to deal with windowing APIs on top of this, and it can be pretty discouraging. You're dealing with a lot of boilerplate before you actually get to the fun parts.
But what if it didn't need to be that way?
Let's go back to a time before all of this nonsense started, even before we had to deal with pesky things like virtual memory, windowing systems, event loops, and the like.
Particularly, I'm talking about going back to DOS, but we'll get to that in a second. ;)
Let's talk first about the contemporary hardware of the time, or else at least the fundamentals of said hardware, which, incidentally, still really holds true today, even if this truth is obfuscated by complexity.
I'm not necessarily going to go into said graphics hardware too much, only to really say that there are plenty of examples of accelerated platforms, even in this era. In fact, probably one of the reasons that video game consoles of the day performed so much better than personal computers at the time was due to the fact that they were purpose-built for the application. Consider the NES PPU and its OAM (Object Attribute Memory), which allows sprite rendering without having to directly write to memory every time, and its plethora of other features designed to meet a video game's needs2. The SNES's Mode 7 is legendary for its ability to create a faux 3D effect well before we actually had real 3D graphics in PCs and consoles.
Even the VGA had some degree of acceleration features and its own API, and as Michael Abrash put it, "the closest we may ever come to a lingua franca of computer graphics" - a platform for the PC, where before no true one actually existed.
So if all of these features and APIs existed, what was different?
Well, firstly, software was still relatively simple. Video games running on consoles or arcade machines, and real mode DOS programs didn't need to multi-task, so writing software for these systems was a vastly easier undertaking than software that's expected to run on a modern system.
Second, direct hardware access was the norm. When complex graphics APIs existed, they were restricted to specialized applications. PHIGS, which can in some ways be seen as a predecessor to OpenGL, never really took off for this reason, and even OpenGL itself did not see so much adoption in the consumer market until the mid-90s, when we saw the first 3D cards from the likes of 3dfx and Nvidia. Before this, it was a bit of a wild west. If you've ever looked a PC game's configuration menu or on-box compatibility stickers from around this time, you probably get what I mean.
While the latter point here might have been particularly annoying for a studio trying to target a broad enough audience for their game to sell, it actually gives us a great canvas to demonstrate how easy graphics programming can be.
Let's go over the two main concepts that make this demo so simple to do.
Note that as mentioned in the last section, these concepts have not necessarily gone away, the methods for which to perform them has just simply changed over time. Particularly, you may be exposed to more of these concepts the lower level you get. If you're curious, the OSDev Wiki is a great resource for these kinds of things.
Simply put, the term framebuffer refers to video memory. The main thing that (usually) differentiates it from other types RAM that may exist on a graphics adapter is that the framebuffer memory is actually mapped to the on-screen image, in the form of some sort of bitmap. Within this region, specific addresses translate to very specific pixels on a screen, usually in some degree of a linear fashion (although things like banking may alternate pixels between different memory regions, translating to different physical chips, etc).
A framebuffer is scan converted into a video signal, at the typical rates you know and love, which has roots in raster CRT and television scan rates (~60Hz NTSC, ~50Hz PAL, etc). Lots of graphics algorithms build on this core concept, and the term raster graphics comes from it.
Real mode was the first x86 processing and addressing mode, a simplistic 16-bit mode (albeit segmented, more on this point in a bit) that saw wide use for most of the life of DOS, even after the 32-bit 386 and beyond were released.
While real mode can be somewhat constrained, especially when dealing with the amount of memory you have available to your program (this is where the infamous 640KB limit came from), there are real benefits here for demo purposes. Specifically, we can access the framebuffer directly from its mapped memory address without jumping through any extra hoops to do so.
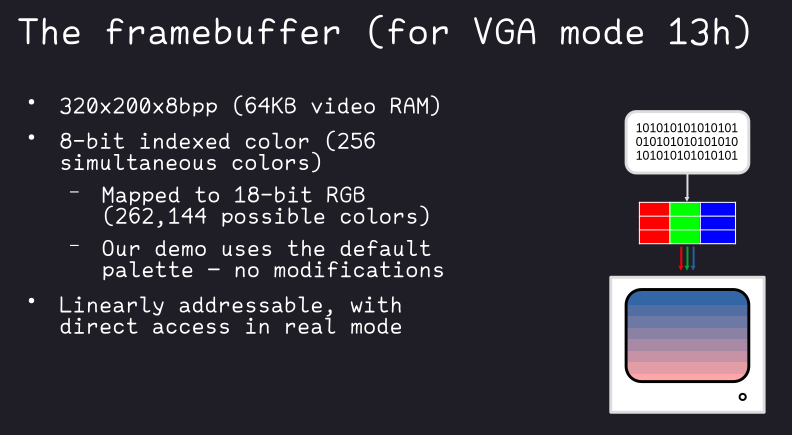
Let's talk about how the framebuffer looks like in one particular VGA mode: mode 13h. This is the mode we will be using in the example.
This is a 320-by-200 pixel mode, with 8 bits per pixel, so one byte per pixel. This byte is representative of an entry in the VGA color table, giving a possible 256 simultaneous colors on the screen at once. It should be noted that this maps to 18-bit RGB palette that is actually modifiable, should you choose, although there is a default one that has a more than reasonable spread of color.

For our sake though, the real reason why mode 13h is great is that its memory is linearly addressable in a byte-by-byte fashion, so it's extremely easy to demonstrate how simple graphics programming can be. Since we're working with real mode, there are no barriers to us getting at this memory from our program directly.
It's time to present our demo. It is contained in full below.
// Our video mode and dimensions
#define MODE_VGA_320_200_8 0x13 // 320x200x8bpp
#define WIDTH 320
#define HEIGHT 200

// 8-color VGA palette gradient, lighter shades of lavender to pink
#define COLOR_OFFSET 0x50
#define COLOR_NUM 8
#define COLOR_STEP (HEIGHT / COLOR_NUM)

char get_video_mode();
#pragma aux get_video_mode = \
  "mov ah, 0x0f" \
  "int 0x10" \
  value [al];

void set_video_mode(unsigned char);
#pragma aux set_video_mode = \
  "mov ah, 0x00" \
  "int 0x10" \
  parm [al];

void wait_for_key();
#pragma aux wait_for_key = \
  "mov ah, 0x00" \
  "int 0x16";

int main() {
  char far *buf = (char far*) 0xA0000000; // VGA memory address
  int x, y;

  unsigned char saved_mode = get_video_mode(); // Save original mode
  set_video_mode(MODE_VGA_320_200_8); // Set our VGA mode

  // Now draw. We draw pixel-by-pixel by directly setting the video memory like
  // it was an array. We step the color every 25 pixels so that we have 8 bands
  // of even height.
  for (y = 0; y < HEIGHT; y++) {
    for (x = 0; x < WIDTH; x++) {
      buf[y * WIDTH + x] = COLOR_OFFSET + y / COLOR_STEP;
    }
  }

  wait_for_key();
  set_video_mode(saved_mode); // Restore original mode

  // Done!
  return 0;
}
This is 49 lines of C code, comments and all, and has a little bit of inline assembly. Its purpose is very simple - to just fill the screen with an 8-band gradient by setting pixel memory directly.
This demo is written in a dialect that is compatible with Watcom C, which was a popular C compiler during the DOS days, and is still being maintained to this day3.
However, there is very little in this code that is Watcom specific – likely only the inline assembler pragmas would need to be changed if you wanted to get this working on another compiler that could target real mode DOS.
With that said, let's talk about the code a bit.
The inline assembly is pretty simple, and we can go over it call by call.
Note that Watcom does have helpers for each of these functions, but the assembly is simple enough that adding the specific includes would only detract from its portability (notice that there are zero headers in the source!).
A quick tangent before we get into the actual functions, because this might be as helpful to you as it was to me if you don't understand assembly.
When I was learning assembly language for the first time, I was also in college and learning about PC hardware in general. The moment when it all came together for me was the realization that a computer is very much a glorified machine, and at the fundamental level is actually structured and behaves very mechanically.
Without getting too much into the weeds, CPUs have registers - small on-die units of memory used for elementary operations, and instructions that tell the CPU what to do with the data in those registers. If you contemplate on this fact, and the title of this section, hopefully it clicks with you too. You can see this kind of behavior even in the most mundane of machines you use on an everyday basis - using a dishwasher or washing machine, for example; load the machine, run a cycle, and then unload your (hopefully clean) result!
Working with peripherals at the machine level is a similar endeavor. While the method of communication varies (registers and calls may actually be memory-mapped, for example), the principle remains the same.
System calls are an important method of pulling the proverbial lever here. These are low-level functions that are generally used by a program to interface with the operating system in some specific way.
In DOS, the BIOS itself actually set up a number of the system calls that were responsible for interfacing with hardware like the screen and keyboard (i.e., what we are using assembly for). Like other system calls, they were set up at specific software interrupts that you could call using the INT instruction. This leads us to the instructions detailed below.
char get_video_mode();
#pragma aux get_video_mode = \
  "mov ah, 0x0f" \
  "int 0x10" \
  value [al];

void set_video_mode(unsigned char);
#pragma aux set_video_mode = \
  "mov ah, 0x00" \
  "int 0x10" \
  parm [al];
All of our graphics functions are called using INT 0x10, the software interrupt installed by the BIOS for said calls.
Functions are set in the high-byte register of AX (AH), with parameters set - and results returned - in the low-byte register (AL). So 0x0F is the function that gets the video mode, while 0x00 is the one that sets it.
Note that the parm and value directives
here are not assembler specifically, but domain-specific for the Watcom
aux pragma, allowing short-hand setting of parameters and
return values4.
void wait_for_key();
#pragma aux wait_for_key = \
  "mov ah, 0x00" \
  "int 0x16";
INT 0x16 calls keyboard functions. As the function name indicates, we're just waiting for keyboard input here by using the blocking version of the call (AH 0x00).
The scancode would be in AL after this returns, but since we don't need it, we don't read it back.
main and our draw loopint main() {
char far *buf = (char far*) 0xA0000000; // VGA memory address
int x, y;
unsigned char saved_mode = get_video_mode(); // Save original mode
set_video_mode(MODE_VGA_320_200_8); // Set our VGA mode
// Now draw. We draw pixel-by-pixel by directly setting the video memory like
// it was an array. We step the color every 25 pixels so that we have 8 bands
// of even height.
for (y = 0; y < HEIGHT; y++) {
for (x = 0; x < WIDTH; x++) {
buf[y * WIDTH + x] = COLOR_OFFSET + y / COLOR_STEP;
}
}
wait_for_key();
set_video_mode(saved_mode); // Restore original mode
// Done!
return 0;
}main is very simple. You've seen
get_video_mode, set_video_mode, and
wait_for_key already, so let's skip over those and just get
to the main attraction and cover the two major things that make this
happen!
char far *buf = (char far*) 0xA0000000; // VGA memory addressThe above address (0xA0000000) is where the BIOS maps
the VGA framebuffer to.
It's worth taking a moment to discuss far pointers. While real mode memory is always accessible without restriction, access is still segmented into 64-KB (read: 16-bit) blocks. Access to memory outside of a current segment requires the setting of specific segment registers to access the data within it, or jump to code contained in the segment5.
Since we're using C here, you are spared from most of the fun of managing segmentation, except, of course, when referencing video memory, or other BIOS-mapped areas. That's where far pointers come in, which allow you to combine a segment and offset together, which then function like any normal pointer would.
One thing that might be confusing when reading the linked memory map is that the address for the video memory area does not appear to match what our far pointer is. This is not a mistake, but rather how effective addresses are calculated in real mode, versus the notation in how far pointers are written.
Effective addresses in the real mode segmentation scheme are
calculated as (segment << 4) + offset. However, when
dealing with far pointers, the notation is the literal
pre-calculation 0xSEGMENT_OFFSET pair. So breaking
down our far pointer as written:
//            +------ segment (0xA000)
//            |   +-- offset  (0x0000)
//            |   |
//            v   v
(char far*) 0xA0000000;
So in this instance, our effective address is
0xA000 << 4 = 0xA0000, plus zero (we don't have an
offset), giving us the effective address of 0xA0000 that we see in the
memory map.
for (y = 0; y < HEIGHT; y++) {
  for (x = 0; x < WIDTH; x++) {
    buf[y * WIDTH + x] = COLOR_OFFSET + y / COLOR_STEP;
  }
}
This loop is the whole of the draw routine.
What are we doing here? We're essentially doing a pixel-by-pixel, scanline-by-scanline (so top-to-bottom, left-to-right) pixel fill of the entire screen. That's it, that's the program.
The color we choose to write in is a simple calculation based on a
starting color COLOR_OFFSET (0x50), plus the line we're on
divided by a certain interval (COLOR_STEP, here, every 25
lines (200 / 8 = 25).) This gives us an 8-color swatch of
the VGA palette, and we choose a section that actually gives us a
gradient from a light lavender to pink.
| 0x50 | 0x51 | 0x52 | 0x53 | 0x54 | 0x55 | 0x56 | 0x57 |
|---|---|---|---|---|---|---|---|
It's now time to run the demo.
To you, I leave the exercise of bootstrapping a DOSBox environment and loading both Watcom and the source into it. But from there I have some commands for you to run, and pretty screenshots!
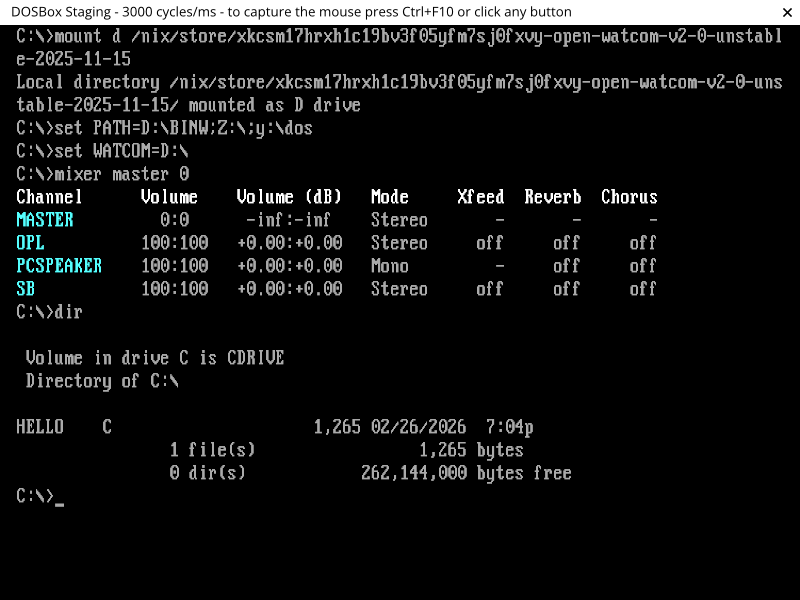
After you have your DOSBox environment set up, you might be interested to know that Watcom actually has a version of vi bundled with it! You can find a reference at https://open-watcom.github.io/open-watcom-v2-wikidocs/vi.pdf. Here, we just use it to inspect the contents of the source file we've loaded into the environment.
vi.exe hello.c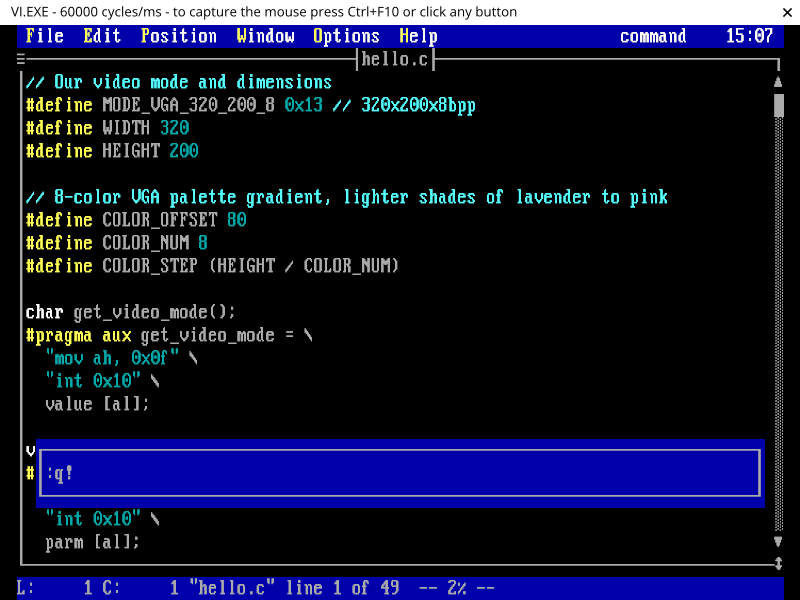
Alright, let's get to building. Hopefully you figured out how to quit
the editor. ;) Now we want to run the single-step compiler and linker
wcl.exe on the source file, which will produce our
hello.exe without needing to link manually ourselves:
wcl.exe hello.c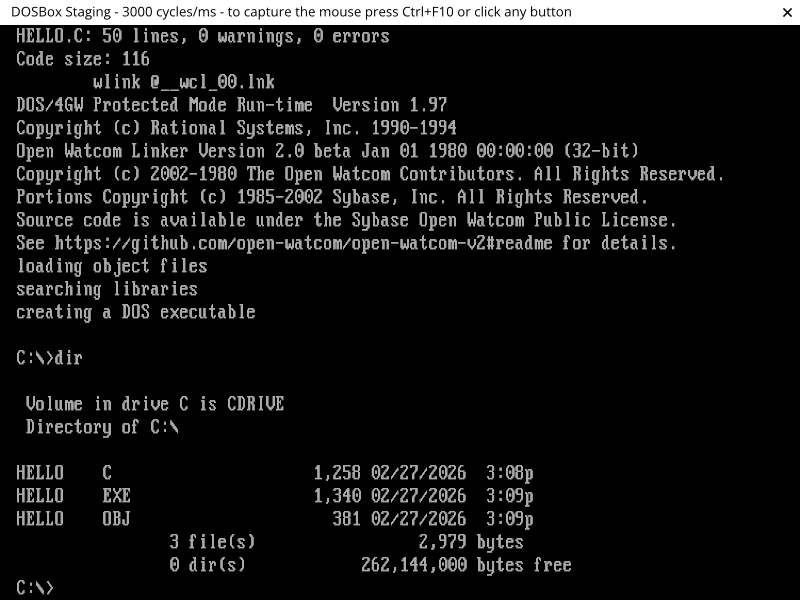
And finally, run the demo!
hello.exe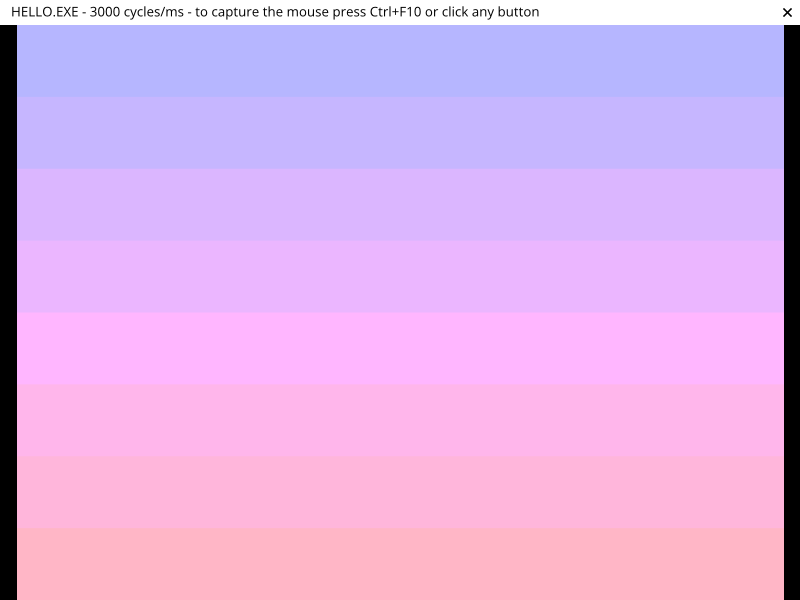
That's it! You can press any key to exit the program.
Congratulations! You're now a graphics programmer. Not so hard after all, eh?
You might be wondering where to go from here, given that this was a pretty simple demo, and in DOS to boot.
Well, funny enough, the whole purpose of this was to demonstrate to you what graphics programming is at the fundamental level - just setting bytes in memory that will get interpreted as an image on your screen. The reason I chose DOS for this demo was to ensure that there was nothing to get in the way of illustrating that.
Pretty much everything else stems from this ground truth. But I'll give you a couple of things to get you started:
Primitives in a graphics programming context generally refers to the building blocks that one would use to draw more complex shapes. For example:
Once you've done some more of the simpler primitives, you can move on to more general concepts, like 2D polygon filling and anti-aliasing, possibly things that I cover in the future!
Lastly, the technique laid out in this post is still very relevant. Plenty of perfectly valid approaches to graphics programming still work with in-memory pixel buffers, even in main memory.
While I'm not going to go into it here because the methods are going to vary depending on the operating system, and even windowing system or API you're using, the two things you might want to look into are the concepts of shared memory and bit-blitting.
Shared memory is usually set up in a way where you use OS facilities to request memory that can then be passed along to your windowing system. From there, access is shared between the two of you, with possibly some degree of concurrency management or double-buffering, where drawing happens in an off-screen memory region which can then be swapped with the currently rendered frame to ensure only whole frames get shown at a time.
Bit-blitting is short for "bit block-transfer", and usually involves you sending your memory to the windowing system (the "transfer" part), where it is combined with other memory representing the on-screen area or window surface. Similar to the more complex concept of composting, a supplied operator dictates how your memory is combined with the memory at the destination, giving a particular effect (like overlaying your image on top of the existing data).
Obviously, this is just a smattering of the topics that you can get into in computer graphics, but hopefully going over it in this way has shown that it doesn't need to be overwhelming, and gives you a good idea of how you can find your own way in the field.
Happy drawing!
I'm refraining from saying that they have them "in shades" here. ;)↩︎
The NES is just an example here - these kinds of features were pretty much a given on any video game console or arcade platform that needed to render video games.↩︎
See https://openwatcom.org/ and https://open-watcom.github.io/ (v2 fork). While I built this project on the v2 fork, I have not thoroughly investigated what one you should stick with for longer-term development - probably a good place to start if you wanted to would be a good vintage DOS/retro PC forum, https://vogons.org/ possibly being one of those.↩︎
There is also another directive here
(modify) that tells Watcom about registers that are
modified by the function, so that the compiler can add instructions to
save and restore them to their previous states. However, Watcom also
always considers AX to be a modified register due to its heavy use, so
we don't need to add it explicitly.↩︎
If it helps, and you're okay about not getting pedantic about the actual differences, you can think of this as a form of paging or banking, in that segmentation is designed to allow the CPU to access memory outside what it normally would be able to address within its word size or original design.↩︎
The :q! in the screenshot there is a hint
for you on how to quit the editor, a rite of passage for all those new
to vi family of editors (Vim, Neovim, etc).↩︎